Table Of Content
A cake board works well, but you can also use anything else that is food-safe and flat for a flat surface. Step 15 – Using a paddle beater, or a hand mixer, add the confectioner’s sugar to the meringue base and mix. Add the sugar a little at a time, on the lowest speed, to prevent the sugar from flying off while mixing. You will need two types of royal icing when making the gingerbread house. The rolled out dough is easier to cut if it’s frozen, so you can choose to freeze it for about 30 minutes before cutting it.
My Favorite Carrot Cake Recipe
You can, however, make your own by blending granulated sugar in a blender or food processor until it is fine and fluffy.
Easy Smoked Trout Dip (or Spread)
Prepare a baking sheet with parchment paper and place the gingerbread pieces on the prepared sheets to bake. Making a gingerbread house is no simple task (unless, of course, you get one of those pre-fab houses, in which case these notes will be of little help). The most successful way to roll out this gingerbread cookie dough is between two sheets of parchment paper. It will stick to your counter no matter how much you flour it. The chimney is totally optional, but I think it’s a cute addition. Find everything you need to make your perfect holiday gingerbread house with our From Scratch Gingerbread House Set.

Tips for Making Gingerbread House Icing
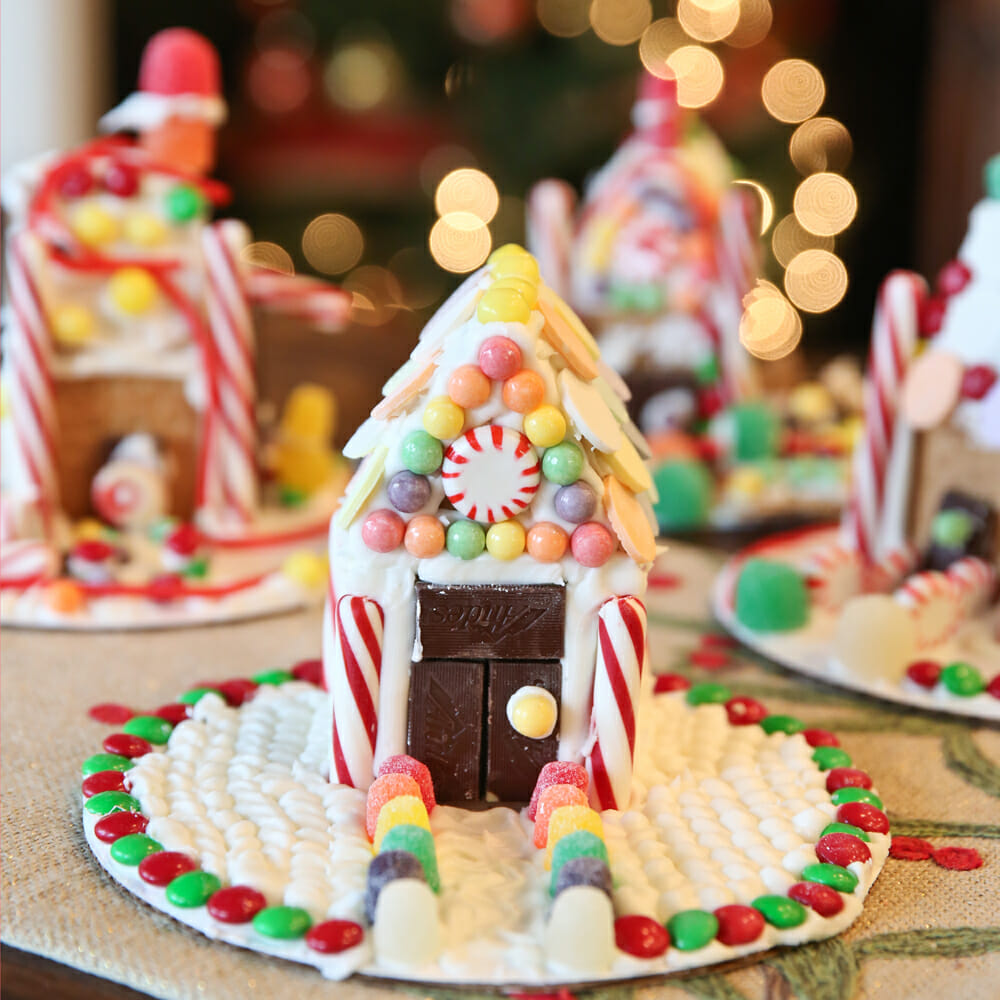
Hold it high over the house and gently shake allowing the sugar to fall onto the roof of the gingerbread house. Piping bags and tips are crucial to creating a beautifully designed gingerbread house. Change out the tips to create fluffy stars down the side of the house or a small round tip to add dots and detailed designs. This is where it really helps to have more than two hands working on a house, and why making a gingerbread house is so much more fun with company than alone. The joy is really in the making, of coming together to work on all the steps that are required to build a gingerbread house from scratch. Other than that, the recipes are pretty similar.
Content and photographs are copyright protected. Sharing of this recipe is both encouraged and appreciated. Copying and/or pasting full recipes to any social media is strictly prohibited.
Any remaining space can be used to cut out the chimney parts, and other gingerbread shapes you like. Place the template on the cardboard and use a bench scraper to make sure that the template is stuck to the board with no bubbles or wrinkles (Image 18). Use slightly thick cardboard and non-toxic glue like a glue stick. Apply the glue on the back of the printed template. Remember to apply the glue outside of the template line AND inside (Image 17). Form each dough portion into a smooth disc, while dusting it with flour to prevent it from sticking (Image 14).
Tips and Tricks for Gingerbread House Icing
I am the owner and author of SimpleJoy.com and I'm so glad that you are here. This is a brief overview of how easy this recipe is. For the full recipe with all of the measurements, be sure to scroll to the bottom of the post for the recipe card. You'll need special equipment to complete this project, including a stand mixer and a disposable pastry bag.
Whiskey Gift Buying Guide
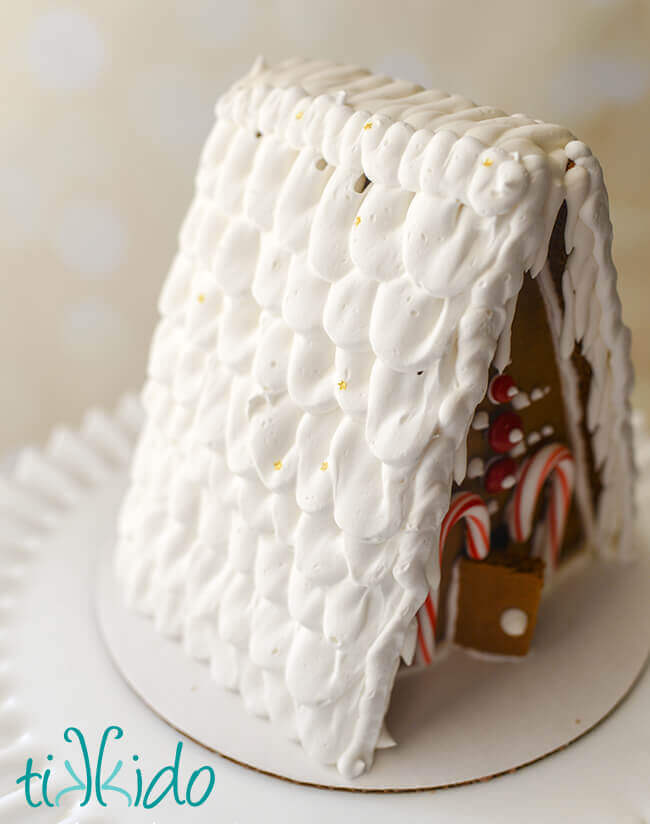
To speed things up, use a hair dryer on its cool setting and on high speed and use the cool air to dry out the royal icing. Do not use warm air as this will melt the royal icing. Allow the royal icing to completely set and harden before adding the roof (Image 41).
Napier’s National Tobacco Company building turned into a gingerbread house - New Zealand Herald
Napier’s National Tobacco Company building turned into a gingerbread house.
Posted: Tue, 12 Dec 2023 08:00:00 GMT [source]
A few years ago, I posted this great gingerbread house recipe. I also have a great post with the template for the gingerbread house. You can print it out and use it to cut the dough to the exact right size. Honestly, using this homemade gingerbread icing will be your secret tool to keep a gingerbread house together. Simply add it to the back of the pieces and hold them together.
Step 6 – Print out the gingerbread house template and get the tools ready. Such as a glue stick, cardboard, and craft or utility knife (Image 16). Once the house is baked and cooled and you have your icing made, it’s time to build the gingerbread house. Use this small batch royal icing to hold together your gingerbread house. We used this recipe when we made our Rainbow Sprinkle Gingerbread House. Pipe royal icing to make decorative designs around the walls of the house and roof.
If you’re looking for another option, meringue powder is a great choice. It’s often used in recipes as a safe, alternative to fresh egg whites. You can usually find it in the baking aisle of your local grocery store. The real question is, after all that hard work, can you actually bear to consume it?
Just roll your dough, cut out two of each shape, imprint the design, and bake — you’ll have a sweet house that fits together perfectly, no math required! Royal icing is the edible "glue" or mortar that holds a gingerbread house together and can be used to make fancy sugar decorations. To add the roof panels, pipe icing along the top of the walls. Place the roof panels and support them while the icing sets (again, only a few minutes if you’re using royal icing).
Next, add icing to the bottom of the back panel and press it against the sides of the house and the bottom of the platter. Add icing to the bottom of the house front panel and the bottom of the side pieces, as well as the sides. Cover the dough in plastic wrap or sealed in plastic bags. To prevent icing from hardening, cover bowl or piping tip with a damp paper towel, and wrap in plastic. Please see our FAQ page for many answers to common questions. Re-roll the scraps so you have enough dough for the entire house.
You’ll need a few baking basics like a rolling pin, parchment paper, a thin spatula, a sharp knife, and piping bags. You’ll also need an electric mixer for the royal icing. Worried you’ll end up with a crumbling, crooked shack, decorations dripping off, misshapen cookie inhabitants looking on with despair? That ensures it will dry out fast, which will keep your designs from smudging and your walls from budging (if you'll pardon the rhyme).